Learn how to best use your school's technology with your Mary Glasgow supscriptions.
Sign-in
You and your students can sign in using their school’s own Google Classroom accounts.
Step 1. Register your account.
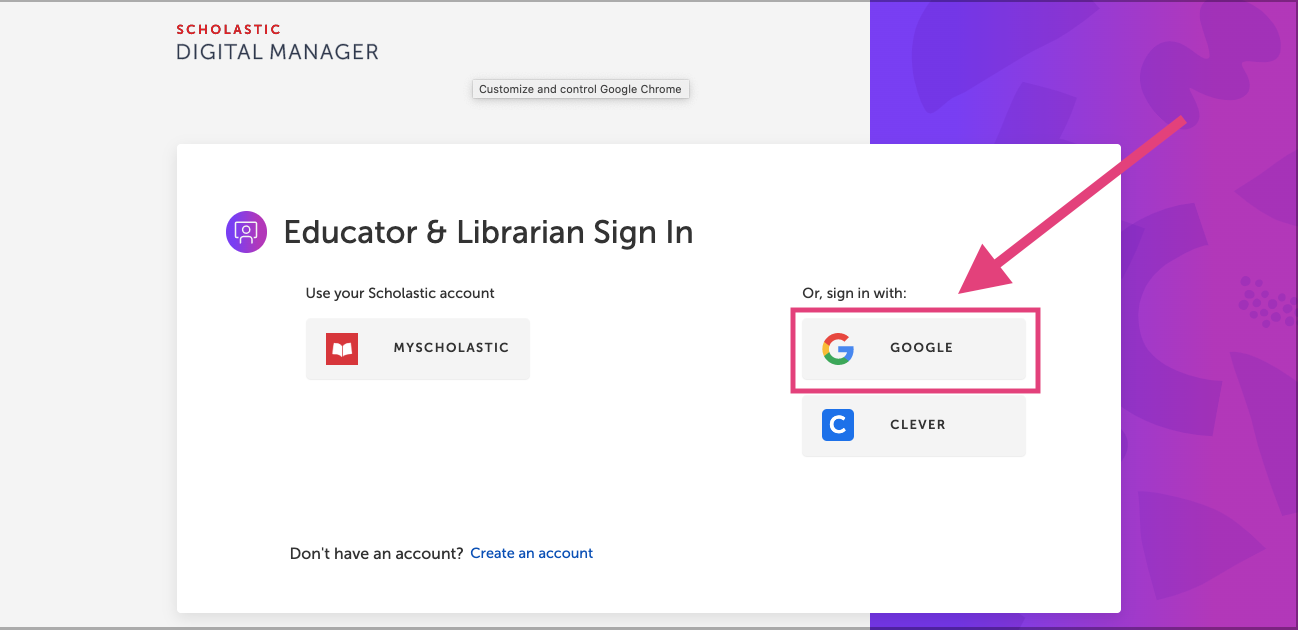
Go to digital.scholastic.com and click “Google Classroom” to register with your school’s Google account. Enter or select the Google account you use with your school.
Step 2. Accept security permissions.
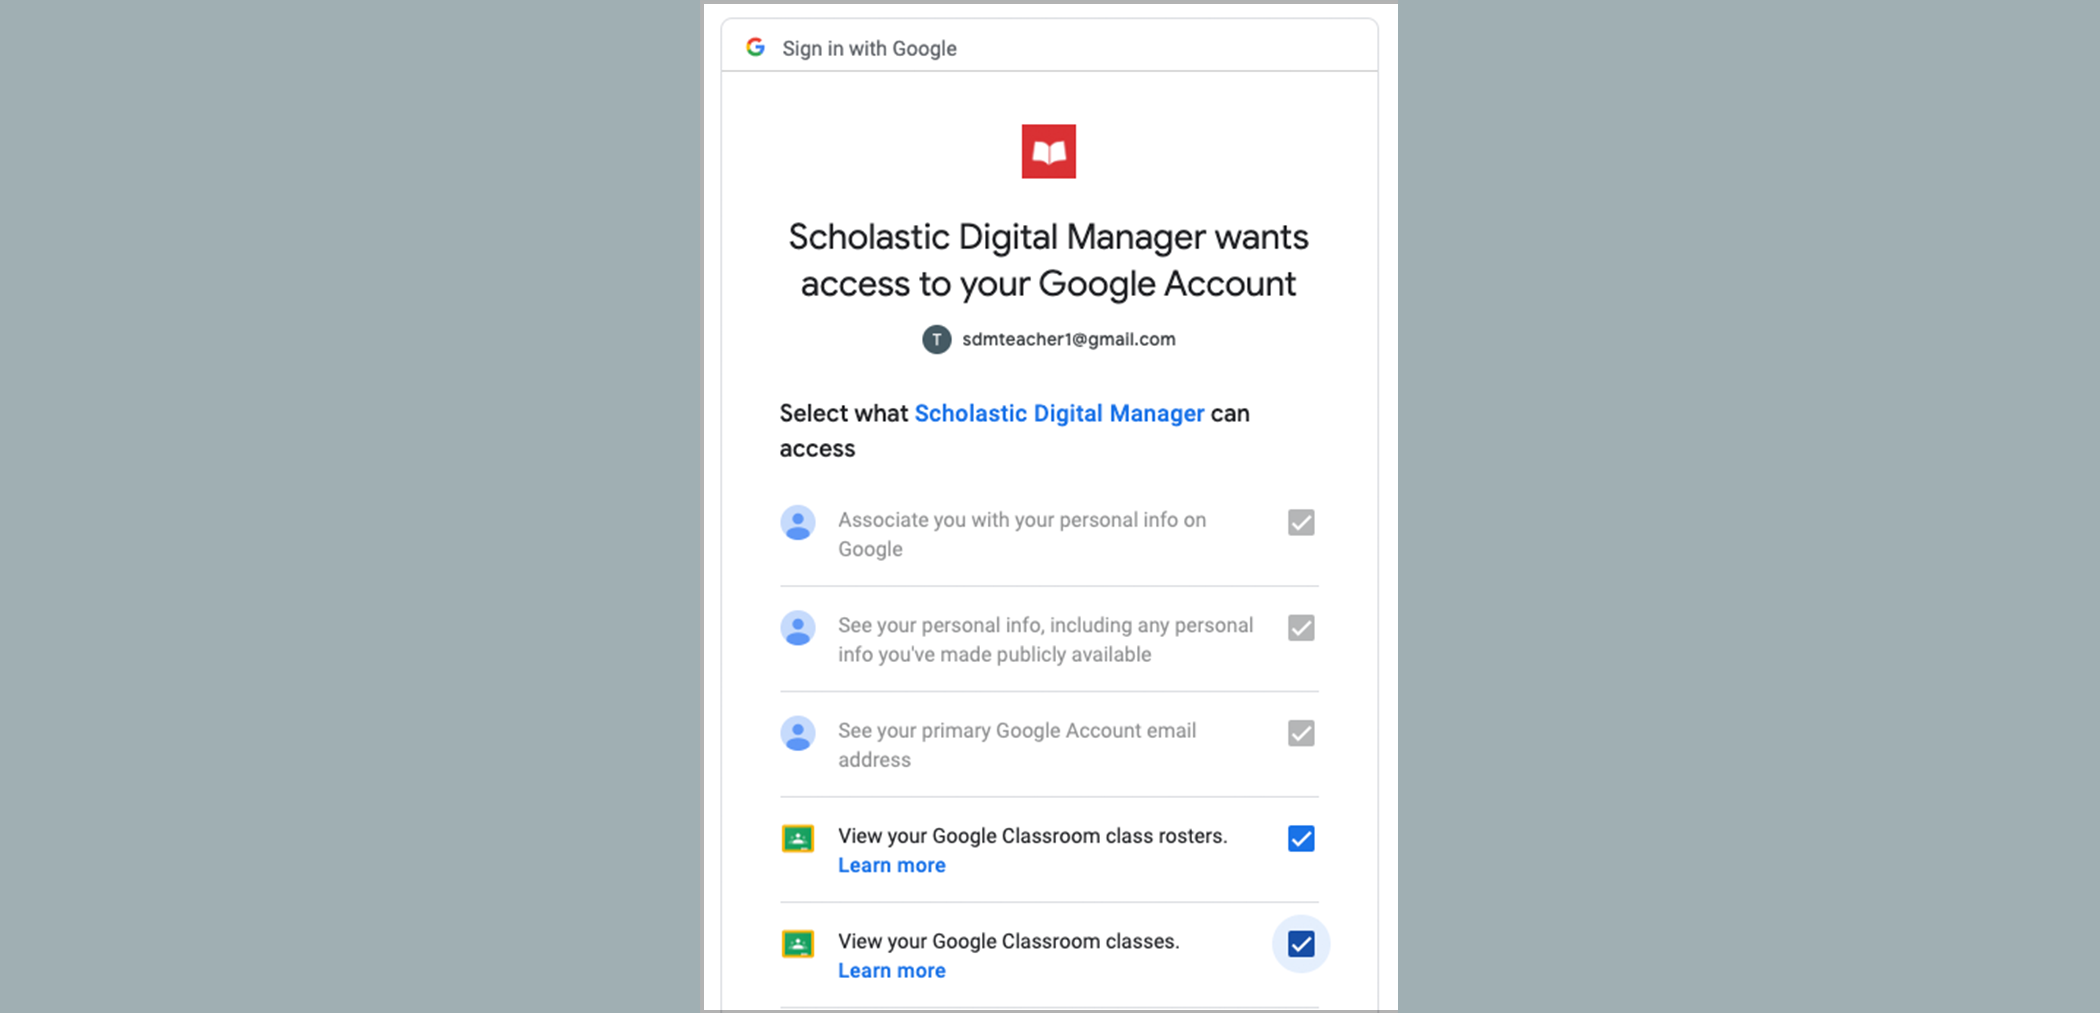
Check the boxes to allow Scholastic Digital Manager to view your Google Classroom rosters and classes. These are only required to allow students to log in using their school’s Google accounts.
Step 3. Enter your access code.
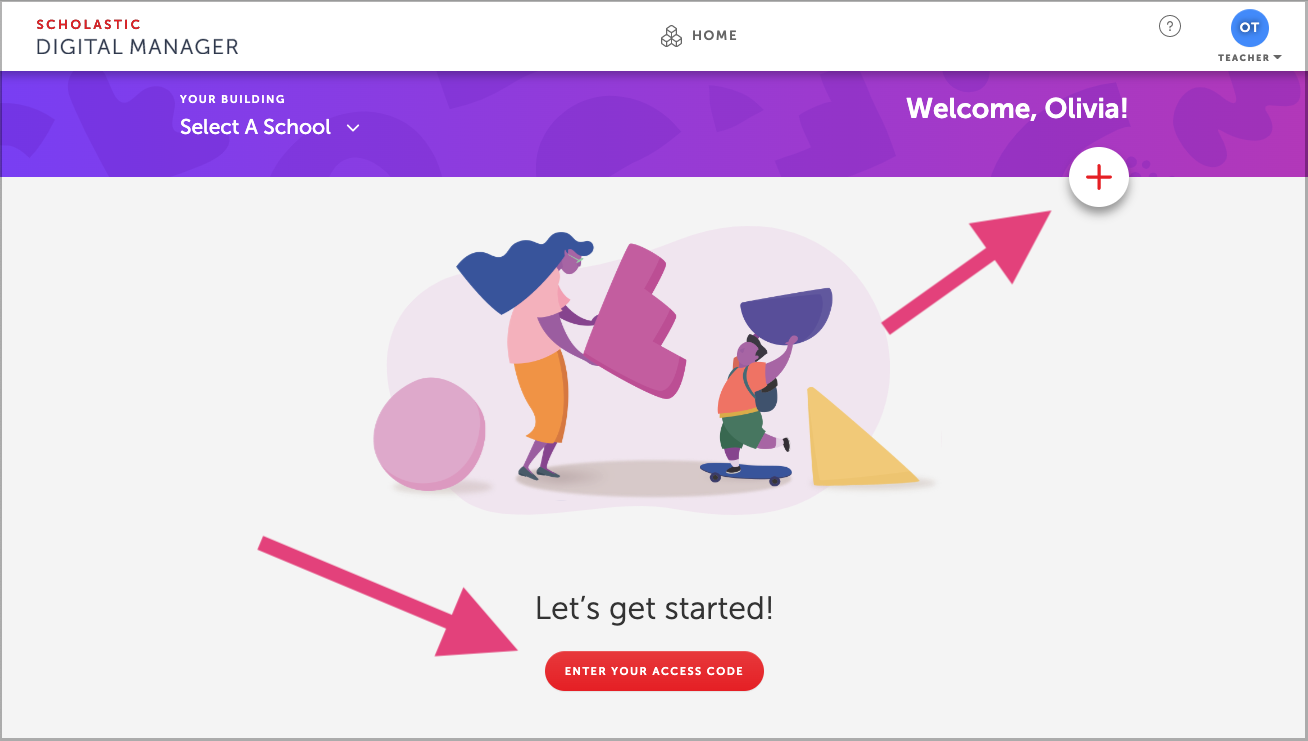
Your Mary Glasgow subscription comes with an access code to activate your account online. (This code can be found on the cover of your Teacher’s Guide throughout the school year.) Click here to enter your access code.
Step 4. Import your classes.
Select “Import New Class” to seamlessly import your class roster from Google Classroom. Follow instructions to select specific classes and grades, and click "Import Class."

Step 5: Enjoy!
Your students now have access to your Mary Glasgow title! You and your students can use your school’s own Google credentials to access your product's website in the future—simply click “Google Classroom” to log in.
Roster Changes
Has your class changed since you integrated with Google Classroom? No problem!
It's easy to import another class, resync a class if a student joins your Google Classroom list, or manage student access to specific products:
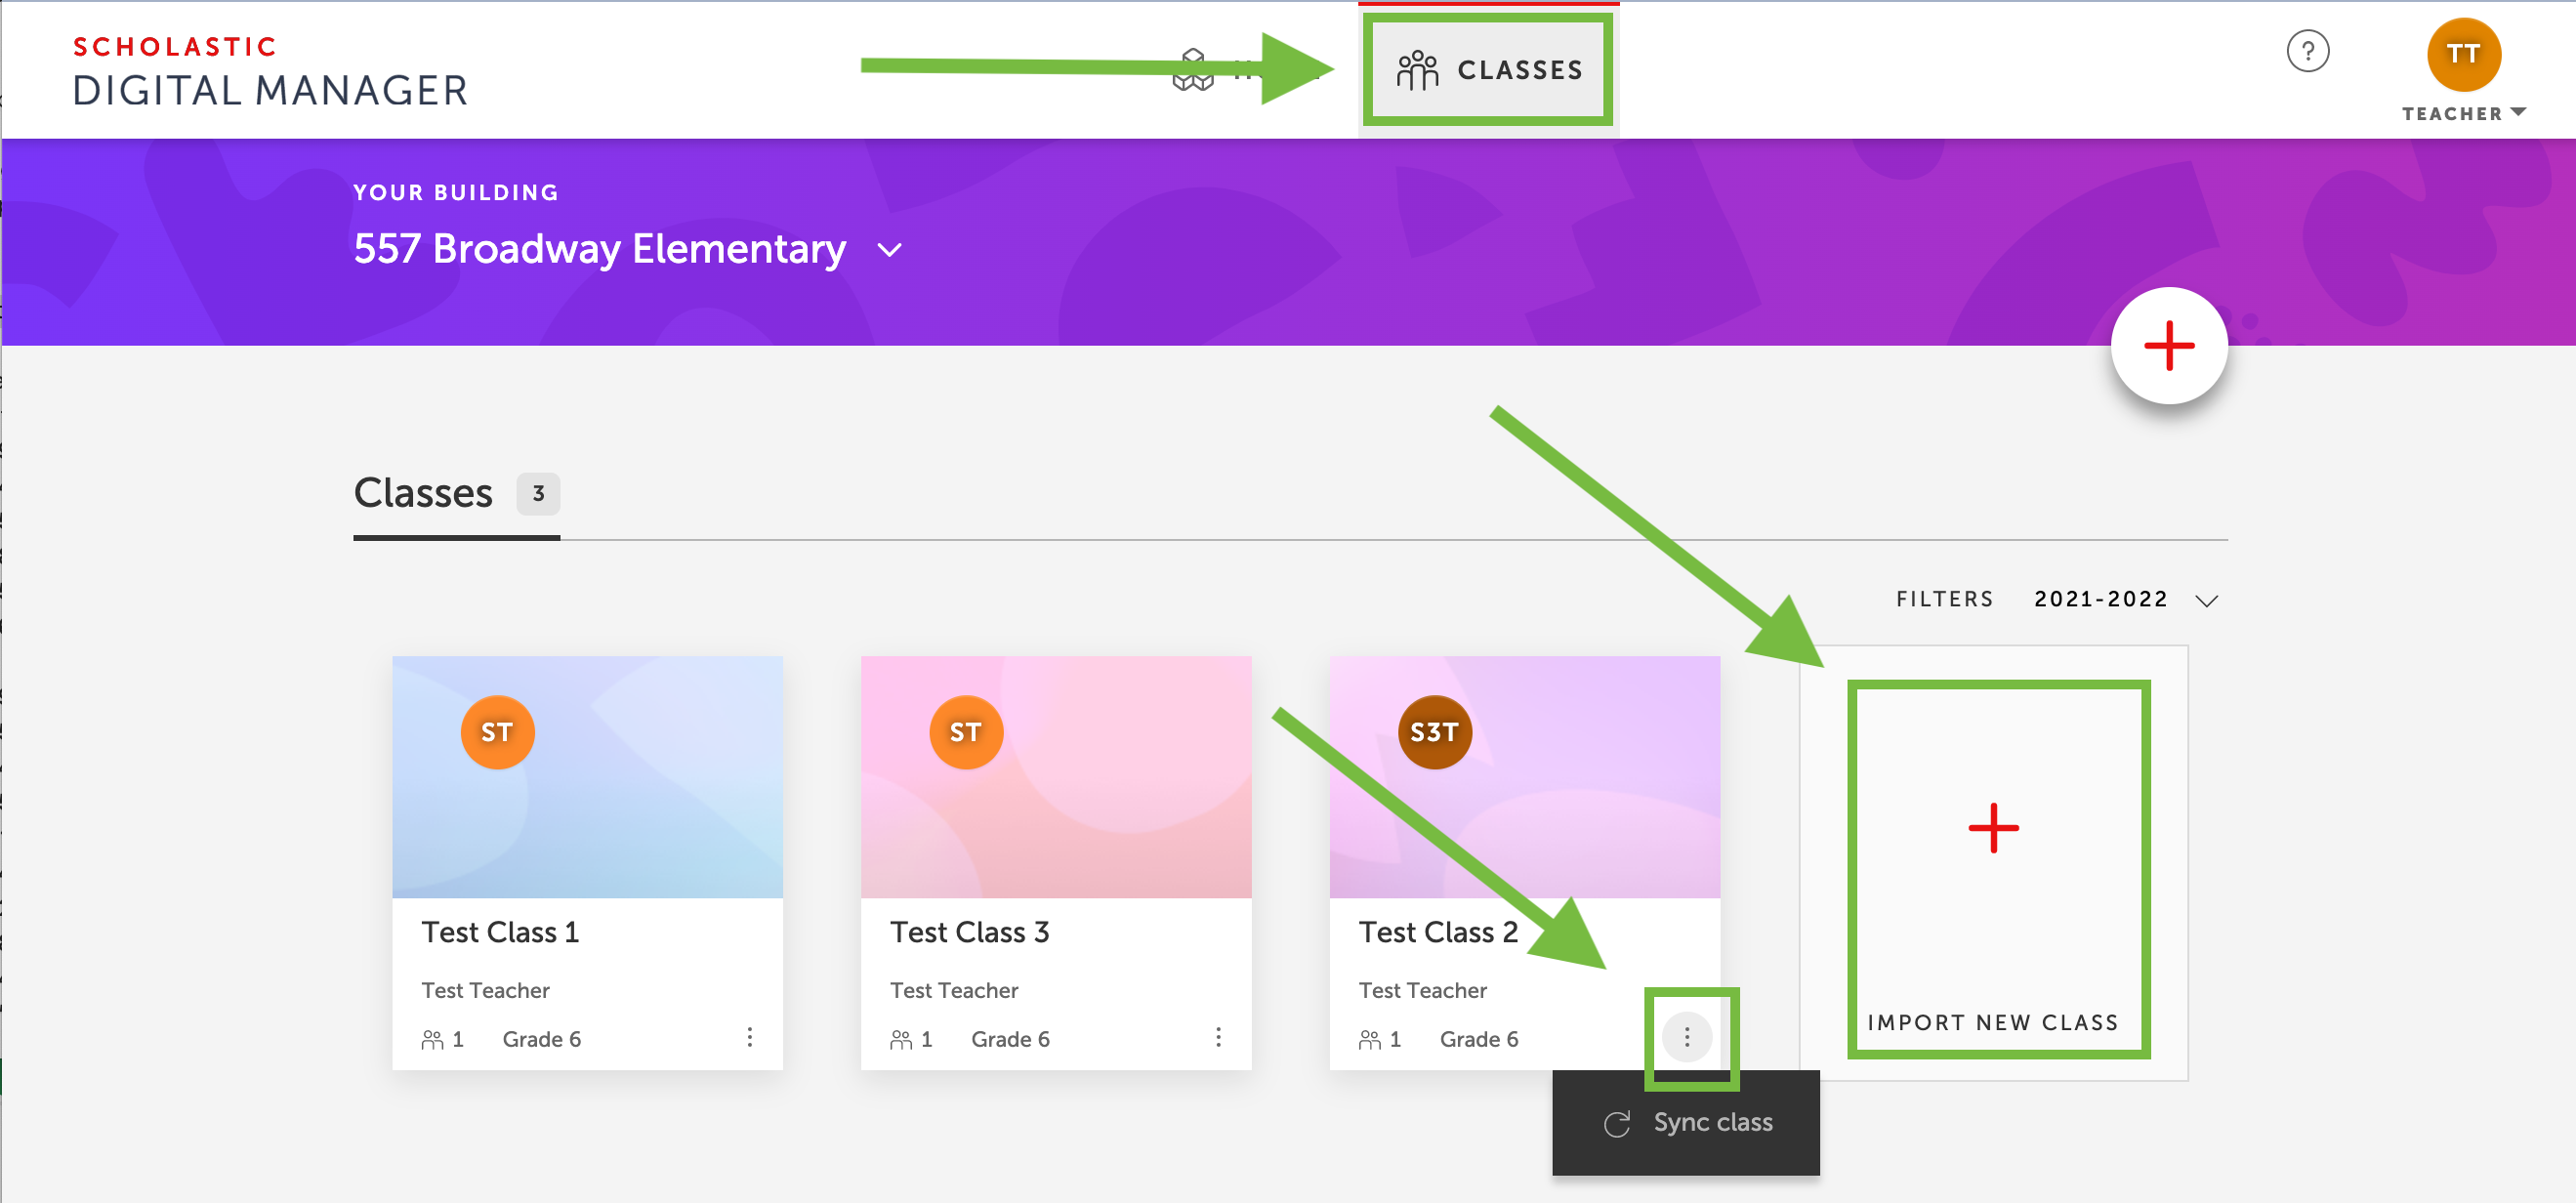
1. After you've updated your class list in Google Classroom, log into your product website.
2. Select "My Dashboard."
3. Click "Classes" at the top of the screen.
4. Click "Import New Class" to add a new class, or "Sync Class" to update an existing roster.
Have a Co-Teacher?
Each co-teacher can separately follow the steps above to:
1. Register on the Scholastic website, using their own Google Classroom account
2. Import your shared class(es) from Google Classroom
Assessments
Customizable, self-scoring assessments for your students.
Copy our interactive Google Quizzes to your Google Drive account to view and even edit them in Google Forms, and assign the quiz to your students. Student responses will be sent back to your copy of the form in your Google Drive account.
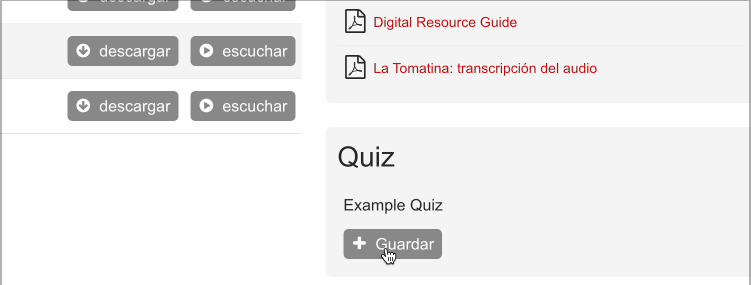
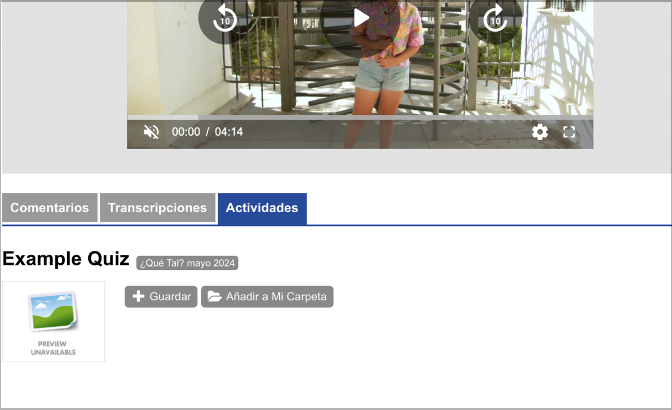
Quizzes can be found alongside other teaching resources on Issue and Video pages.
Issue page:
Video page:
Copying and Customizing Google Activities
From any Issue or Video page, choose the Quiz you’d like to share. It will be copied to your Google Drive. From there, you can either view and edit this quiz before assigning it or assign it directly in Google Classroom.
If you want multiple choice questions to be graded automatically, go to the answer key section of any question and assign it a point value. For selected-response questions, the answer key is already built in, so entering these point values allows Google to grade the correct responses and add the appropriate number of points.
If you want to give your students the ability to submit unfinished work and come back to complete it at a later point, click on the settings icon at the top of the page and check “edit after submit.”
Assigning
You can easily assign our Google Activities whether or not you use Google Classroom.
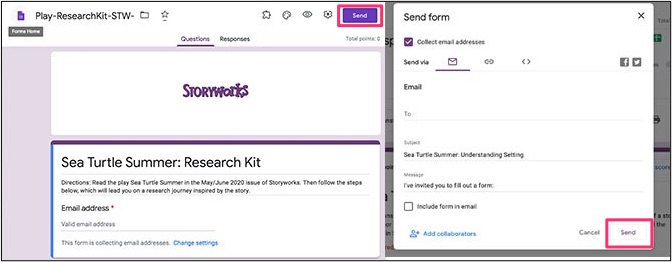
If you are outside of Google Classroom:
Click SEND at the top of the screen. You’ll get the option of emailing all of your students a link to the activity or copying a link to it which you can then paste into whatever program you use to share links with students.
If you are in Google Classroom:
Go to the “Classwork” section of your Google Classroom and click Create -> Assignment. Then click the “add” button in the assignment to add in the activity from your Google Drive.

Grading
Viewing Responses
Once your students have completed the assignment, you can view each of their work within Google Forms and grade any constructed response questions. Here’s how to do that without having to look at the spreadsheet:
1. Open up the activity you assigned in Google Forms. (You should be able to click into it from your assignment in Google Classroom, or find it in your Google Drive.)
2. Click the “Responses” tab at the top to see a list of Student responses. If you don't see a Responses tab, make sure you're in editing mode: Just open up the Google Form you assigned and click on the pencil icon on the bottom right of the screen, and then you should see the Responses tab at the top of the page.
3. In the "Responses" tab, click on the "Individual" button. That's where you'll be able to look through each student's response.
Importing Grades into Google Classroom
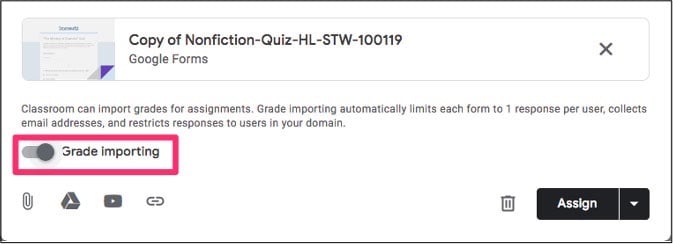
Depending on how your school is set up in Google Classroom, you may also have the option of importing grades directly from the Form. To do that, click “Grade Importing” when you create the assignment in Google Classroom.
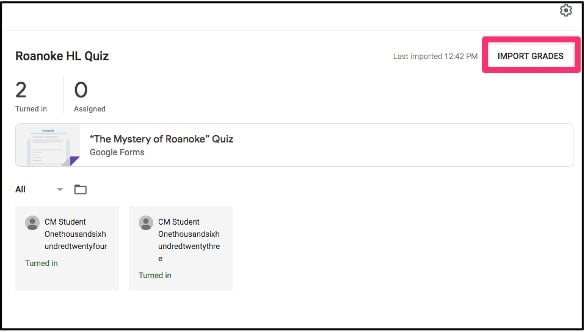
Then, once the forms are completed by the students, you’ll see an “Import Grade” button for that assignment in Google Classroom. Click on that to pull in all the grades for the class.
Returning Grades
When you’re done with grading the Google Activities, there are a few ways you can return the scores to your students:
If you are outside of Google Classroom:
In the Responses tab of the form, you’ll see a “Release Score” button at the top of each student’s response. Click that, and you’ll be able to send an email to your student with their final grade, as well as any feedback you’d like to give.

If you are in Google Classroom:
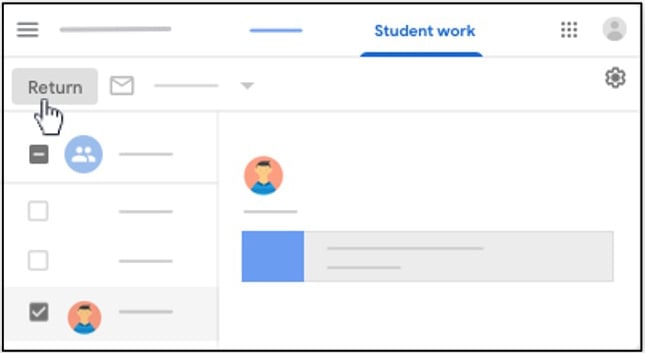
When you're looking at the assignment, there should be a list on the left-hand side with the name of every student that returned the activity, along with their grades. (You may need to enter the grades in this area yourself, or you could have the option of importing the grades from the quiz -- that depends on how your school is set up with Google.) You'll see a RETURN button at the top. Click that button, and then students will be able to see their scores in Google Classroom, without them having to check their email accounts. They'll find their scores if they click into the assignment, and also if they go into the "Classwork" tab and click "View your work".
